Overview
The Person Exhibits item in the Person Entry list controls the inclusion of person exhibits. Person exhibits are attached to the main record for the subject whereas other exhibits are attached to sources, citations, etc.
If the Person Exhibits item is enabled, the selected person exhibits (primary, non-primary, or both), are included in a location based on the position of the Person Exhibits item in the Person Entry list.
You may add one or more Person Exhibits items.
Narration Format
When using the Narration Format, Gedcom Publisher has special rules for handling the Person Exhibits item.
- If the Person Exhibits item immediately precedes an enabled Body Tag Set item,
- and Primary or Non-primary is set to "Primary Only" or "Primary or Non-primary",
- and Exhibits.Person (Primary) is set to "Embed",
- or both Exhibits.Person (Primary) and Exhibits.Person are set to "Link",
... the HTML element that contains the person exhibits will float to the left allowing the narrative text in the following Body Tag Set flow to its right.
The conditions that meet the rules described above are met by the default property values in a new .gsfile.
The rules above are approximate. There are some combinations that are not described, but explaining the edge-cases would make the description hard to follow for the usual cases.
Properties
Title
The Title identifies the item in the Person Entry item list. If Show Title is checked, the title appears above the exhibits in the Person Entry.
Show Title
If the Show Title checkbox is checked, the Person Exhibits Section will begin with the title. The default value is unchecked, and the title is omitted.
Primary or Non-primary
The Primary or Non-primary pull-down menu controls whether the current Person Entry Item inserts primary, non-primary, or both exhibit types.
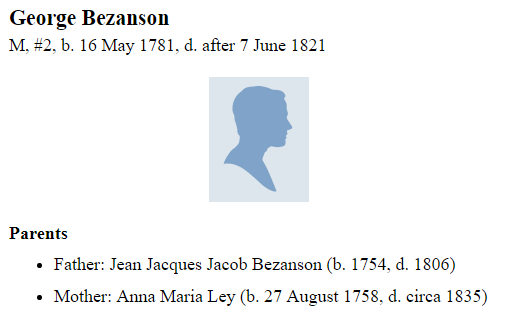
Silhouettes
The Silhouettes list provides an opportunity to insert an image as if it was the primary image exhibit when the person does not have a primary image exhibit. Add one or more Silhouette items to the Silhouettes list using the [+] button beneath the list.
If the current subject does not have a primary person image exhibit, Gedcom Publisher will process each Silhouette item until the current person passes the Silhouette item's filter or there are no further Silhouette items to process. When the current subject passes a Silhouette item's filter, Gedcom Publisher will insert that Silhouette item's image as if the image was the current subject's primary person image exhibit.
For example, if you wanted gender-specific Silhouette images added to each person who did not have a primary image exhibit, you would:
- Add a Silhouette item where the image showed a male silhouette and the filter term was set to select males only, and
- Add a Silhouette item where the image showed a female silhouette and the filter term was set to select females only.
Silhouette Properties
Image
Click the Image button to select the image file you want to use as a silhouette. Gedcom Publisher will open a standard Windows "open file" dialog window. Use the navigation controls in that dialog window to move to the folder that contains the image you want to use. Select the image file, then click the [Open] button. Gedcom Publisher will display the image.
You may use graphic files with the extension PNG, JPG/JPEG, or GIF. Choose images that are similar in size (or reduced size) to the images you assign as primary image exhibits.
Image File Handling
Immediately after you select the image file, Gedcom Publisher will respond as follows:
- If the image file is located outside the Input (-i) folder, Gedcom Publisher copies the image file to the
ui(user images) subfolder of the Input (-i) folder. - If the image file is located in a subfolder of the Input (-i) folder, including the
ui(user images) subfolder or any other subfolder, Gedcom Publisher uses that image file and does not copy it. - If the image file is located in the Input (-i) folder, and not in a subfolder, Gedcom Publisher copies the image file to the
ui(user images) subfolder of the Input (-i) folder.
The processing described above allows you to define subfolders under the Input (-i) folder to organize or categorize images. However, you must create the subfolders manually and copy the image files into the Input (-i) folder subfolders manually before you click the [Image...] button to choose the image.
If Gedcom Publisher makes a copy of the image file, the original date is retained.
In any instance where Gedcom Publisher makes a copy of the image file, if you subsequently change the original image file, the change will not be reflected in the book contents. You must edit the Image User Item and re-select the original file to update the copy used by the book. Optionally, you may manually update the copy of the file that is stored in a subfolder of the Input (-i) folder.
Gedcom Publisher includes a few images you are free to use as Silhouettes in your site. The [Image] button will open to the folder that contains those image files, but you are not limited to those choices. If you do not want to use one of the icons included with Gedcom Publisher, use the navigation controls in that dialog window to move to the folder that contains the image you want to use.
Gedcom Publisher will resize the image according to the Width and Height properties. The resized image will have the same aspect ratio as the original image.
It's usually best to use an image that is the same dimensions as, or smaller than, the dimensions of your typical primary image exhibit.
Width
The Width property determines the maximum width of the image.
It's usually best to use the same Width and Height values for all your Silhouette items.
Height
The Height property determines the maximum height of the image.
It's usually best to use the same Width and Height values for all your Silhouette items.
Title
The Title identifies the item in the Silhouettes list. The Title does not appear in the Person Entry. It is only used to identify the Silhouette item.
Enabled
The Enabled checkbox controls whether or not the Silhouette item is processed when Gedcom Publisher is making the book. If Enabled is unchecked, the Silhouette item is ignored.
Person Filter
Add Filter terms to the Person Filter list to select the people who should be assigned the image for this Silhouette item.
Tooltip
Use the optional Tooltip textbox to enter a brief explanation of the image. The tooltip appears when the visitor's hovers over the image.